
Published in the News-Review March 13, 2026
By: Bonnie Courter
Question: I’m excited about getting my seeds started, and I came across an interesting method of seeding called “Seed Snails”. Can you tell me more about it?
Answer: Well, I never thought the word “seeds” and “snails” could be used together, so I had to do some research. And yes, this seems to be quite the “rage” on the internet – a new innovative way to seed your veggies, and anything else you want to seed – that takes up less space, is more efficient, and actually grows much longer roots than you would by seeding in the plastic cell blocks normally used. The name itself comes from the rolled-up, snail-like appearance of these seed rolls.
Since a picture is worth a thousand words, a simple internet search should give you a better description of this method. (Though we should always be skeptical what we see online, this has been tried by different Master Gardeners across the country and Canada.)
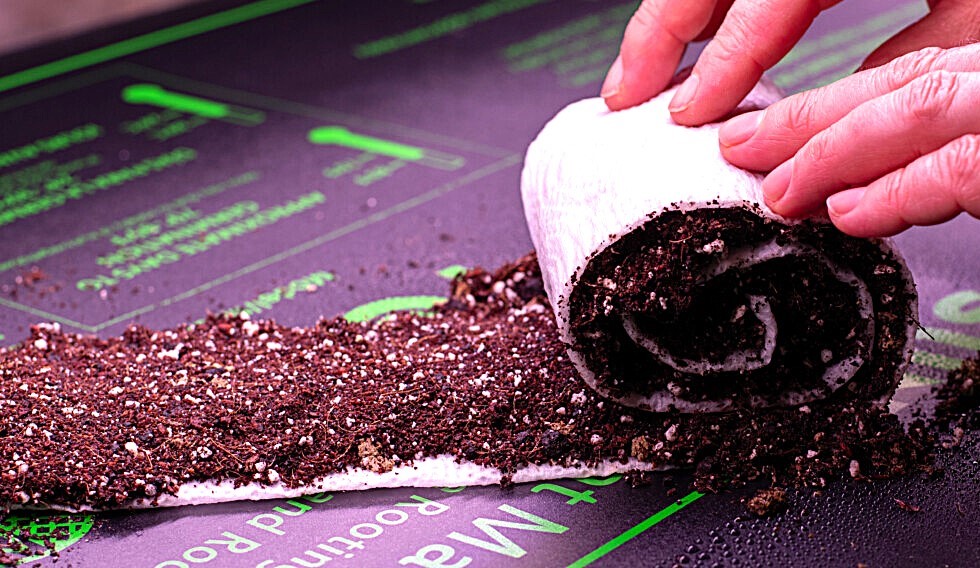
Materials needed are seed-starting soil that has been wetted down, scissors, painter’s tape, labels and a marker, and wrapping material. The wrapping material can be any number of things such as small cell bubble wrap or packing foam (which has the advantage of being readily available and reusable), thin cardboard, wax paper, or recycled weed barrier. (The problem using fabric is the roots tend to grow into the material, making it difficult to separate them when it’s time to plant the seedlings.)
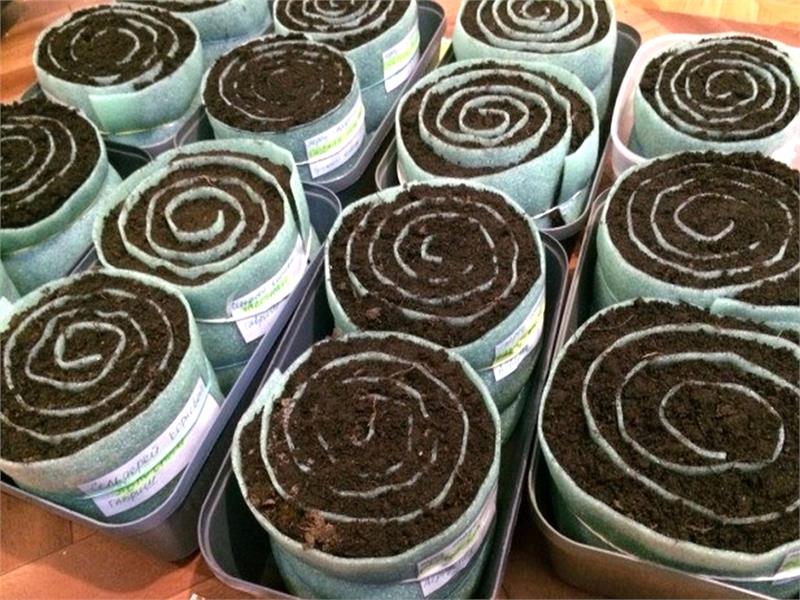
Trim the wrapping material to a length and width to suit such as 2’ long by 6-8” wide. Remember, the larger the seeds, the longer your length should be. Then layer the soil about 1/2”-1” deep (depending on the size of the seeds) on top of the material, covering it end to end, but leaving a few inches at one end and 1” at the top clear of soil in order to fasten the roll. Then gently roll it up like a jelly roll and fasten with masking or painters tape.
Place your seed roll upright and place on a tray. Now just place your seeds into the soil along the spiral, making sure you place them to the correct depth and spacing. Plant each snail roll with a single crop to better identify what plant is sprouting. Multiple rolls can be grouped together in one tray or container that has good drainage, meaning less space is needed.
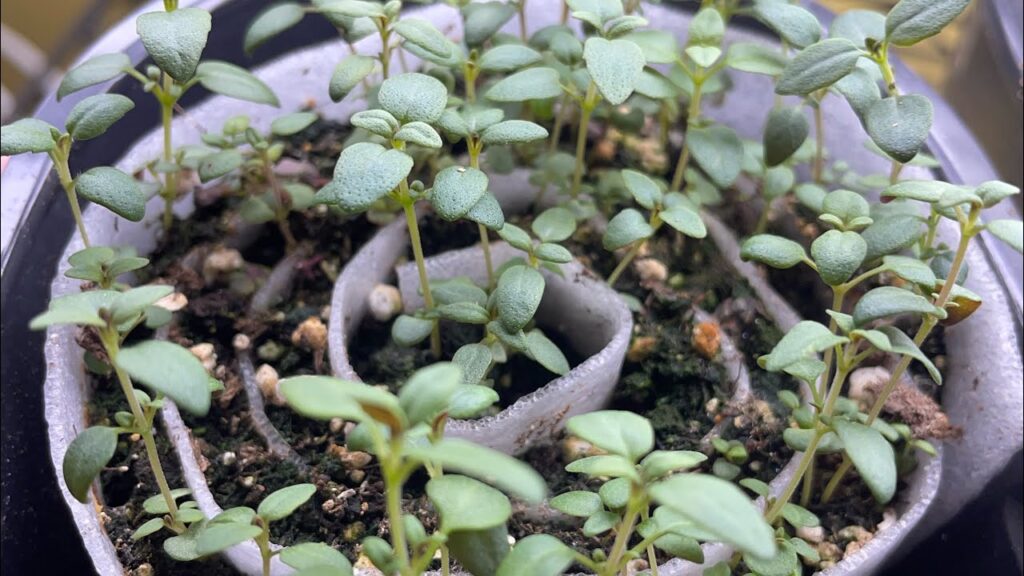
Label each roll with the plant variety and date seeded using old popsicle sticks inserted in the roll or you can mark the tape using a Sharpie. You’ll be amazed how many plants you can get in each roll! Place the rolls on the tray and place in a sunny windowsill, under grow lights, cold frame, or hothouse as you would before. Keep the soil damp with frequent misting. It’s easy to overwater your “snails”, but remember there’s not much soil in them so they do need to be monitored carefully to ensure they stay evenly damp.
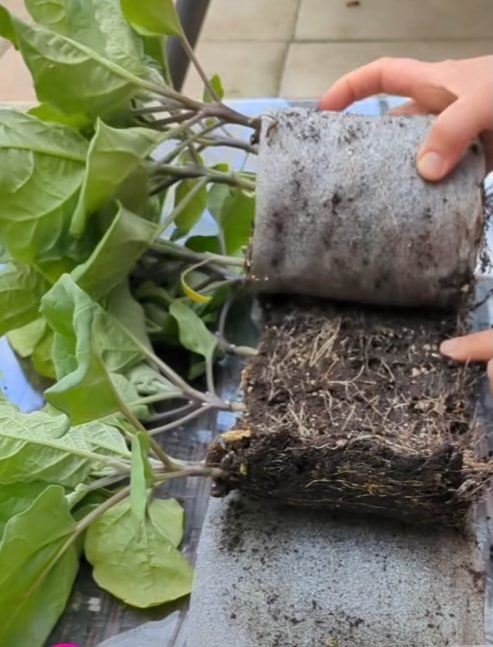
As the seedlings grow, you don’t need to up-pot them right away. Instead simply unroll the “snail” and add more soil. When the plants show a couple of true leaves and they’re ready to go outside, gradually harden the seedlings off for 2 weeks, setting the rolls outside each day, then bringing them back inside. To plant in the ground or in pots, just unroll and gently tease out the roots. These roots will grow vertically instead of horizontally and should easily separate out. Don’t wait too long to plant them out as they can become root bound easily with such a limited soil space.
And there you have it. I’m excited to give this method a try this week myself. Let me know if you try it too and we’ll compare notes!
Do you have a gardening or insect question? Contact the Douglas County Master Gardeners at douglasmg@oregonstate.edu or 541-672-4461 or visit 1134 SE Douglas Ave., Roseburg. Douglas County Master Gardeners are trained volunteers who help the OSU Extension Service serve the people of Douglas County.